
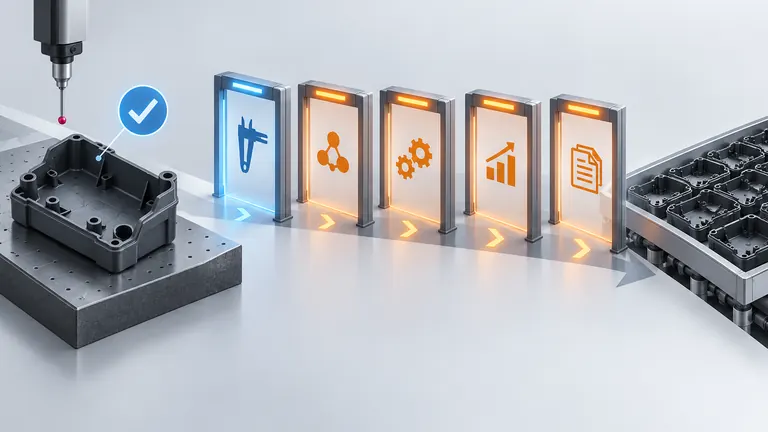
Conceptual illustration; not to scale.
Home › Blog › T1 Sample Approval vs. Production Release: What Still Needs to Be Closed?
Automotive sourcing and manufacturing decision guide
A visually acceptable T1 part creates momentum: the tool closes, the surface looks reasonable, and the sample fits at first inspection. The danger is linguistic rather than cosmetic. If “T1 approved” is treated as permission to produce or ship, open design, process, measurement, validation, packaging, and capacity evidence can disappear behind one ambiguous status.
Accept T1 only for the decisions its recorded trial supports. Before production release, separately close the controlled product definition, tool corrections, serial process, inspection readiness, product and assembly validation, packaging, capacity, deviations, and customer-specific approval. The final release must name the part revision, tool and cavities, material, process, quantity or period, and the person or system authorized to ship.
A reliable handoff therefore replaces the single word “approved” with a traceable evidence matrix and a release statement whose boundary cannot be mistaken.
In This Guide
- Define the T1 Question and the Trial Condition
- Use Status Language That Cannot Be Misread
- Open-Item and Production-Release Evidence Matrix
- Avoid the “Looks Good” Release Trap
- Recheck Evidence After Every Tool, Process or Design Correction
- Authorize Production Release With a Named Boundary
Define the T1 Question and the Trial Condition
Why this matters: T1 is used differently among customers, toolmakers, and molding teams. Without a defined purpose and recorded trial state, later reviewers cannot tell which observations are valid after the tool or process changes.
Define T1 in the project plan and record the exact tool, cavity, material, machine, process, and sample condition. Use the event to identify feasible features, defects, corrections, and the next evidence required—not as automatic serial approval.
T1 usually means the first sampling event from a newly built or substantially changed mold, but customers and toolmakers may use the label differently. Define it in the project plan instead of treating the label as a standard milestone with universal content.
Record tool revision, inserts/cavities active, press and auxiliaries, resin grade/color/lot, process settings, manual operations, sample start/stop, and known deviations from intended serial conditions. Without that baseline, a “T1 approved” note cannot tell later teams what they accepted.
Use T1 to make decisions: steel-safe correction, dimension rework, gate/vent/cooling change, texture timing, process-window study, assembly confirmation and next sample plan. Do not attach a broader release meaning than the evidence supports.
Write a T1 trial brief before the mold enters the press. It should identify the questions to answer, active cavities and inserts, steel-safe features, material and color, available machine and auxiliaries, intended or provisional process, requested samples by purpose, measurements, mating parts, appearance condition, and decision owners. This prevents a trial optimized only to produce attractive photographs while the team still lacks cavity-level dimensions, fill behavior, ejection observations, or interface samples.
After the run, separate observations from approvals. Record whether each cavity filled and ejected, where flash, short shot, burn, weld, sink, warp, drag, or imbalance appeared, and what process range was attempted. Link sample IDs to dimensions and assembly findings. Illustrative use scenario: a T1 housing fits one mating component and looks acceptable, but two cavities use temporary hand finishing and final resin color was unavailable. The result can support interface learning and a correction list; it cannot establish repeatable appearance, labor, cycle, or production release.
Physical feasibility
Does the current tool fill, pack, cool, eject and produce identifiable parts from each intended cavity?
Issue discovery
Which dimensions, surfaces, interfaces and process behaviors require correction or further study?
Next decision
What can be frozen now, what remains open, and what evidence is required at the next trial?
Use Status Language That Cannot Be Misread
Why this matters: A bare “approved” status is copied into emails, purchase orders, and schedules without its original context. Teams may release steel, texture, customer builds, or shipments based on different interpretations.
Name the approved object, purpose, revision, sample population, limitations, and next authorized action. Record temporary acceptance with quantity or time limits, containment, deviation identity, and expiry.
Replace a single “approved” field with the object and scope of approval. Examples: “T1 samples accepted for assembly evaluation,” “appearance direction accepted for texture release,” or “tool correction list approved.” None of those phrases authorizes serial shipment unless the named authority says so.
Likewise, “dimensions reviewed” is not “all drawing characteristics conform.” State sample count, cavity coverage, report revision, deviations and whether the measurement system was production-ready.
If a customer grants limited or interim approval, record quantity/time limits, deviation number, affected requirements, containment and expiry. A temporary decision should not become an undocumented permanent baseline.
Use a status sentence template: “[Authority] accepts [identified samples/evidence] from [tool state and revision] for [specific purpose], subject to [open items]; this [does/does not] authorize [next action].” Examples include acceptance for assembly evaluation, authorization to apply texture after dimensional closure, approval of a steel-correction list, or release of a limited customer build. Each phrase makes a different commitment. Keep the status in the controlled issue or release system, not only in an email subject line.
For dimensional or appearance review, name what was actually examined. “Dimensions acceptable” should identify report revision, characteristics covered, cavities, sample quantity, method, and deviations. “Appearance accepted” should identify surface state, material/color, lighting or master conditions where applicable, and whether texture or polish is final. If the authority grants interim use, record segregation and traceability, approved quantity, destination, additional inspection, rework rule, and expiry. Closed-loop language protects both schedule and product because everyone can see what remains prohibited.
Open-Item and Production-Release Evidence Matrix
Why this matters: Product, tool, process, quality, delivery, and customer approvals mature at different times. A single checklist tick can hide an open gate that belongs to another function or authority.
Use an open-item and release-evidence matrix with one row per gate, linked evidence, status, deviation, owner, due date, and approval authority. Production release occurs only when all applicable blocking rows are closed or formally bounded.
Volvo Group’s public phased PPAP model separates product conformity, process validation and capacity verification into different approval phases. That OEM-specific model illustrates the core distinction: sample acceptance and production release answer different questions.
For each row, record status, evidence link, open issue, owner, due date and approval authority. The examples below describe evidence types, not a universal submission level.
Tailor the provided matrix to the part and customer. Mark each example as applicable, not applicable with rationale, open, accepted, conditionally accepted, or rejected. Product definition belongs to the design authority; tool condition may involve tool engineering and asset ownership; process and inspection require production-quality evidence; validation may require a customer or laboratory; packaging and shipment can involve the receiving plant; capacity may use a separate Run at Rate; formal PPAP or equivalent follows the customer-specific route. One person should maintain the integrated status without claiming authority over every row.
Illustrative use scenario: T1 dimensions are acceptable for three cavities, the fourth needs an insert correction, texture is not applied, the production gauge is unfinished, and a customer assembly build is booked. The matrix may authorize identified samples from the three cavities for that build while keeping tool correction, appearance, measurement-system readiness, process evidence, packaging, capacity, and shipment release open. A traffic-light dashboard alone is insufficient; each color must lead to the evidence and decision that produced it.
| Open item | Evidence needed before release |
|---|---|
| Product definition | • Released CAD/drawing/specification • Engineering changes incorporated • Material/color/appearance requirement • Critical interfaces and regulatory marks |
| Tool condition | • Correction list closed by cavity • Gate/vent/cooling/ejection condition • Texture/polish and replaceable inserts • Tool documentation and spare plan |
| Process validation | • Intended press/auxiliaries/operators • Documented process window and parameters • PFMEA/process flow/Control Plan alignment • Stable output and capability evidence where required |
| Inspection readiness | • Approved measurement method and fixtures • Measurement System Analysis where required • Sampling/frequency/reaction plan • Cavity, lot and status traceability |
| Product validation | • Dimensional and appearance results • Assembly and functional results • Material/environmental tests • Authorized disposition of every deviation |
| Delivery readiness | • Pack quantity/orientation/dunnage • Labels and traceability fields • Transport/handling validation where required • Lot release and shipment records |
| Capacity readiness | • Required rate and time basis • Run at Rate/capacity study if required • Downstream/shared-resource bottlenecks • Maintenance/changeover assumptions |
| Formal authority | • Customer-specific PPAP/submission status • Part Submission Warrant or equivalent if applicable • Deviation/interim approval boundaries • Named production/shipment release authority |
Avoid the “Looks Good” Release Trap
Why this matters: Visible quality is persuasive and easy to communicate, but photographs and a few attractive parts can conceal dimensional, functional, material, cavity, and non-serial-process risks.
Treat appearance as one controlled evidence stream. Evaluate only surfaces and conditions ready for judgment, preserve agreed masters and viewing controls where required, and continue independent checks of hidden features, material, interfaces, and process state.
Appearance can be critical, but it is one evidence stream. A part may look acceptable while an interface is out of tolerance, a hidden weld line weakens function, a material is not the released grade, or the process uses non-serial cooling and manual handling.
Conversely, T1 appearance may be intentionally incomplete when final texture, color or polishing follows dimensional and tool corrections. State which surfaces are evaluable and which are not.
Use photographs only as supporting records. Lighting, angle, exposure and compression can hide gloss, sink, flow or color differences; preserve physical boundary samples and controlled viewing conditions when the customer requires them.
Define the appearance baseline before review: surface zones, texture or polish state, resin and color, gate evidence, allowed witness marks, lighting, angle, viewing distance, cleanliness, and master or boundary sample where the customer specifies them. If the tool is intentionally untextured at T1, identify which sink, read-through, flow, weld, gloss, or color observations are provisional. Texture can change draft and release behavior, so appearance approval and authorization to texture should be linked to dimensional and tool-correction decisions.
Photographs are useful for issue location and communication, but exposure, compression, white balance, and viewing angle make them weak substitutes for a controlled physical evaluation. Preserve sample identity and cavity. Continue checking hidden ribs, clips, sealing or locating features, mating stack, and material status even when the show surface looks good. Conversely, do not reject an otherwise useful T1 solely because an intentionally unfinished surface lacks the final appearance; record what can be judged now and the condition required for the next review.
Recheck Evidence After Every Tool, Process or Design Correction
Why this matters: Corrections after T1 alter the evidence baseline. Reusing pre-change dimensions, assembly results, or process data without assessing impact can make the release package internally inconsistent.
Map every design, steel, gate, cooling, material, process, or source change to affected characteristics and records. Define targeted or broad revalidation before making the change, and keep pre-change and post-change populations separate.
Map each change to affected characteristics and evidence. A local insert correction may require only targeted dimension/assembly recheck; a gate, cooling, material or process-window change can affect warpage, appearance and capability across the part.
Volvo’s PPAP requirements list engineering-change documents, dimensional/material/performance results, master samples and customer-specific records, and require notification for changes such as drawings, process, material and sub-tier supply. Your customer’s rules determine the actual resubmission scope.
Do not combine data from pre-change and post-change samples into one capability or validation population unless the approved method explicitly permits it and the baseline remains equivalent.
Use a change-impact table with change ID, old and new revision, physical or process area, reason, affected functions and characteristics, cavities, documents, samples, tests, capability studies, packaging, capacity, customer notification, and approval owner. Local changes are not automatically local in effect. Moving a gate can alter fill orientation, weld position, pressure, shrinkage, warp, surface, and cycle. Cooling changes can affect dimension and appearance across a wider region. A resin or color-source change can affect processing, shrinkage, appearance, and required material or performance evidence.
Decide the repeat scope from technical linkage and customer rules, not schedule pressure. Update CAD, drawing, tool records, risk analysis, process flow, PFMEA, Control Plan, work instructions, gauges, and sample plan as applicable. Identify samples with the resulting tool and process state. If existing evidence remains valid, document why the changed condition cannot affect it and who accepted that rationale. Never combine measurements from before and after a meaningful change into one capability dataset merely to increase sample size.
Local geometry change
Recheck the feature, related datums, mating interface and any nearby cooling/ejection effect.
Flow/process change
Reassess fill balance, weld lines, pressure, dimensions, appearance and process controls across affected cavities.
Material/source change
Reconfirm released identity, processing, shrinkage, appearance and required performance/change approval.
Authorize Production Release With a Named Boundary
Why this matters: A complete-looking technical report can still lack the authority, quantity boundary, deviation status, packaging, or capacity evidence needed to make and control production shipment.
Issue one named production-release record that references every applicable gate and defines part revision, tool and cavities, material, serial process, inspection, packaging, approved deviations, quantity or period, destination, and release authority.
AIAG’s PPAP errata notes that some customers require a Run at Rate before warrant submission; this is another reason not to infer capacity release from T1. Packaging may also need customer/plant validation before first delivery, as illustrated by Volvo’s delivery manual.
The final decision record should name the part and revision, tool/cavities, material, process and inspection baseline, accepted deviations, packaging revision, approved quantity or period, and the person/system authorized to release shipment.
If the mold is still in development, use the automotive injection mold manufacturing route to define trial deliverables. Use the quality evidence page to specify release records and the short RFQ for a project-specific review.
Scope boundary: This article is a planning aid, not an OEM approval rule. The released drawing, contract, customer-specific requirements and agreed validation plan control the actual project.
Conduct the final review using the matrix, not memory. Confirm that the released design matches the tool and inspection program; corrections are closed by cavity; production conditions and controls are documented; measuring equipment and methods are ready; required dimensional, material, appearance, assembly, functional, and environmental results are dispositioned; packaging and labels match the destination; and capacity evidence covers the required route. Then verify the customer submission status and any customer-specific requirements. APQP, PPAP, or an OEM form should be named accurately rather than used as a generic quality label.
The release record should also control exceptions. For every deviation, identify the requirement, authorized quantity or time, containment, traceability, destination, owner, expiry, and replacement plan. Separate authorization to produce from authorization to ship when the process requires it. Communicate the effective revision and stock disposition to scheduling, production, quality, warehouse, and logistics. If any blocking condition changes—tool, material, process, sub-tier source, inspection, packaging, capacity, or design—trigger the applicable change and reapproval route before continuing.
Conclusion
Use T1 to close defined tool and product questions, then manage production release through a separate evidence matrix and named authority. Bring the T1 report, correction list, released CAD and drawing, material status, validation requirements, intended serial route, packaging, capacity need, and every open deviation to the next gate review.
Related Decision Guides
- Planning a Pilot Production Run for Automotive Plastic Parts
- Automotive Molding Capacity: What a Run-at-Rate Trial Should Demonstrate
- Keeping Repeat Automotive Molding Orders Consistent with Approved Samples
Turn T1 Findings Into a Controlled Release Plan
Share the T1 report, correction list, released part data, customer approval requirements and intended production conditions. The next review should close named evidence—not merely schedule another sample date.
If the inquiry popup does not open in your browser, use the full automotive project RFQ.